A windshield looks simple, just a big piece of glass at the front of the car. In practice, it’s part of the vehicle’s safety cage, a structural member that supports the roof in a rollover and keeps airbags working as designed. When someone asks for an auto glass quote or a quick windshield replacement quote, they rarely expect to talk about adhesive chemistry, federal standards, or calibration tolerances for cameras. Yet those are the details that keep a replacement from turning into a liability.
I’ve spent years around collision shops and mobile installers, watching what separates careful work from corner cutting. The surprising truth is that most of a safe job happens in the prep and the curing, not in the visible installation. If you understand what matters, you can read a windshield replacement invoice like a pilot checks a preflight sheet, and you’ll know which questions to ask before you hand over the keys.
The windshield is not just glass
Modern windshields are laminated safety glass, a sandwich of two glass sheets bonded to a plastic interlayer, typically PVB or SGP. That interlayer is what stops shards from flying if the glass cracks. But the real safety function comes from the bond between the glass and the vehicle’s body, usually a steel pinch weld coated at the factory. A high strength urethane adhesive turns the windshield into a stressed member. In a moderate frontal crash, the passenger airbag hits the glass with hundreds of pounds of force as it deploys toward the occupant. If the glass isn’t bonded correctly, the airbag can blow the windshield out, leaving nothing to catch it.
Roof crush resistance also depends on this bond. Automakers design the body to use the windshield’s stiffness, which is why adhesives and primers matter. You can feel it if you drive a car with a poorly bonded glass: more wind noise, a faint rattle over rough pavement, and sometimes water creeping in at the corners. These annoyances are early signs of a structural problem.
The rulebook installers live by
Two sets of standards guide proper windshield replacement in North America. The first is Federal Motor Vehicle Safety Standards, mainly FMVSS 205, which covers glazing materials, and FMVSS 212 and 216, which cover windshield mounting and roof crush. Automakers certify vehicles to those rules at the factory. A proper replacement needs to restore the original performance. The second is the Auto Glass Replacement Safety Standard, AGRSS, managed by the Auto Glass Safety Council. It’s a voluntary standard, but reputable shops certify to it and agree to audits.
Here’s what those standards mean in plain terms. The glass must meet ANSI/SAE specs for optical clarity and strength. The adhesive must be tested with the glass and the vehicle substrate, and must be applied per the adhesive maker’s instructions. The installer must control bonding surfaces, primer compatibility, curing time, temperature, and humidity. Any advanced driver assistance sensors that rely on the windshield must be returned to spec with a documented calibration.
An AGRSS registered shop posts its registration and often stickers it on invoices. Does registration guarantee excellence? Not automatically. It does mean the shop has trained technicians, documented procedures, and a willingness to be audited. That’s a good start.
Adhesives, primers, and the clock that protects you
Urethane adhesives carry most of the safety burden. They’re strong in shear, resist moisture and UV, and remain slightly elastic over years of heat cycles. You’ll see big brand names on tubes, but the critical information is the lot number, the expiration date, and the safe drive-away time at the current temperature and humidity.
Every urethane has a cure window. At 70 degrees Fahrenheit with moderate humidity, a one-component, moisture-curing urethane might reach a safe drive-away time in 60 to 240 minutes. Drop the temperature into the low 40s, or raise the humidity to swamp levels, and the timing changes. Two-component urethanes cure through a chemical reaction and aren’t as humidity dependent, which helps in cold weather. That said, two-component systems demand correct mixing and a fixed work time.
Primers are not optional. They do three jobs: they promote adhesion to glass and to the painted pinch weld, they seal bare metal to prevent corrosion, and some also block UV that would degrade the adhesive. Skipping primer or using the wrong one can lead to bond failure months later, especially at the top edge where UV exposure is strongest. I’ve seen otherwise clean installations fail a simple knife test because a tech didn’t abrade and prime a small paint chip where the old bead came off. A single quarter-inch spot of rusty pinch weld can wick moisture and undermine the bond.
If you ever watch a good installer work, the rhythm tells you what they value. Gloves on to keep skin oils off surfaces. Dry-fit the glass. Set blocks for height and alignment. Remove cowl panels and trims rather than trying to slip the glass under them. Trim the old urethane to a consistent 1 to 2 millimeters, leaving a sound layer known as a full-cut method, which gives the new bead a compatible surface to fuse with. Clean, activate, prime, then lay a continuous, even triangular bead. All of that prep takes longer than setting the glass.
Glass quality, OEM versus aftermarket, and when it matters
You will hear strong opinions about original equipment glass. OEM glass is made to the automaker’s specification, often by the same companies that supply the aftermarket. The differences show up in optical clarity, frit band consistency, acoustic interlayers, and exact bracket placement for sensors and mirrors. On a base sedan without a camera, a high quality aftermarket windshield might be indistinguishable in use and cost half as much. On a luxury vehicle with acoustic lamination, heads-up display, heated wiper park, and a front camera bracket, the low bid can turn into a headache.
Light bending is subtle. I’ve driven cars with some aftermarket glass where straight lines appear wavy at the outer edges, or the HUD projection ghosts. On long night drives that’s fatiguing. The price delta between the cheapest and a reputable aftermarket brand is often 80 to 200 dollars. That’s money well spent. If you need a camera bracket or rain sensor pad, the positioning must match the camera’s field of view. A few millimeters off can make calibration impossible.
Shops that do a lot of ADAS work keep a shortlist of glass brands that calibrate consistently on specific models. Ask them what they prefer for your make and why. If the answer is vague, consider another shop.
The ADAS calibration piece most people miss
If your vehicle has a forward camera behind the windshield, you need to plan for calibration. Automakers require a static calibration with targets, a dynamic road calibration, or both. Calibration brings the camera’s internal model of the world back into alignment after any change in its optical path. New glass changes refraction slightly, and even a perfect replacement can shift that a hair. Calibration confirms the lane centering, automatic emergency braking, and traffic sign recognition functions see what they should.
Good shops own factory-level targets or approved aftermarket equivalents, and they document pre-scan, calibration results, and post-scan. Expect an extra hour to several hours, depending on the make. Some require a level floor, precise lighting, fixed distances, and full fuel. Weather can affect dynamic calibration. Insurance policies increasingly cover calibration as part of a windshield replacement, but approvals vary. If your windshield quote looks surprisingly low on a camera-equipped car, ask whether calibration is included and how the shop handles it.
I’ve seen both extremes. A mobile tech replaced a Subaru windshield in a driveway and sent the customer to the dealer for calibration, which turned into a two-hour bill and a second day without the car. Another shop blocked off a corner of the building with marked floor squares, factory Subaru targets, and a step-by-step worksheet that matched the service manual. The second job cost more on paper but kept control of Conway car window repair quality and time.
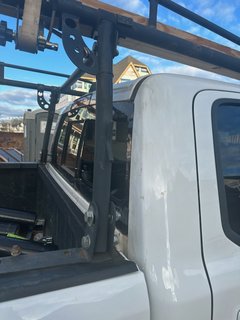
Mobile versus in-shop work
Mobile service has its place. For simple vehicles without sensors, in mild weather, a mobile tech with the right canopy can deliver a safe, clean result. The limitation is environmental control. Adhesives cure based on temperature and humidity, and roadside wind can blow dust onto bonding surfaces. I like mobile replacement for rock chips or older cars with straightforward glass. For late-model cars with ADAS, in-shop has advantages. A controlled bay allows proper prep, bead application without contaminants, and immediate calibration.
One detail often missed on mobile work is safe drive-away. If your driveway sits under 50 degrees on a damp day, a standard urethane might need the car to stay parked for much longer than the shop’s normal schedule allows. That’s not the tech’s fault if they used the manufacturer’s chart and told you. It does mean you should arrange your day around that timing. If you must drive sooner, ask the shop to use a low-SDAT adhesive validated for your conditions.
Water leaks, wind noise, and how professionals chase them
Not every leak means a bad installation. Some vehicles trap water under the cowl or A-pillar trims if clips are reused or misaligned. A drip at the top corner can come from a roof seam upstream. To isolate a leak, pros use a smoke machine or a pressure test with a soapy solution, checking for bubbles along the bead while the cabin is slightly pressurized. Wind noise at highway speeds can come from a tiny void in the bead or mis-seated molding. The fix is often to remove the trim, check bead continuity with a mirror and light, and add a controlled urethane fillet where the void exists. If an installer suggests smearing silicone along the edge, that’s a red flag. Silicone contaminates urethane surfaces and makes future bonding difficult.
I watched a tech spend forty minutes on a barely audible whistle at 70 mph in a late-model hatchback. He found a 1-inch gap where the bead thinned below the daylight opening near the mirror patch. That amounted to two minutes of fix and a day of curing. Slower than a quick smear, but correct.
A step-by-step look at a proper replacement
Shops use different tools, from cold knife to wire systems to power cutters. The exact method matters less than disciplined steps and surface control. Here is the essence of a safe job, boiled down to the actions that matter most.
- Inspect the vehicle, document existing damage, and verify the correct glass, moldings, clips, and sensors. Scan for diagnostic codes if ADAS is present. Protect the interior and paint, remove cowl and trim as needed, and cut out the old glass without gouging the pinch weld. Trim the old urethane to a consistent, thin layer. Repair any bare metal with the correct primer and let it flash off per spec. Clean and prime the glass and any attached brackets. Dry-fit the new windshield, set spacers for height and centering, then lift it off to lay a continuous, even triangular bead of urethane with no breaks or bubbles. Set the glass in one move, verify alignment, light tap to seat, reinstall trims, and observe the adhesive maker’s safe drive-away time. Calibrate ADAS as required and provide documentation.
Those five bullets cover an hour or two of concentrated effort on a simple car, and most of a day on a complex one. Shops that rush usually skip one of those steps.
The insurance and pricing maze
A windshield replacement quote can range wildly, even within the same city. The glass itself might be 150 to 1,000 dollars depending on the model and features. Add moldings, clips, sensor brackets, rain sensor gel pads, and labor, and a luxury car can reach 1,800 to 2,500 dollars, especially if acoustic or infrared glass is required. ADAS calibration adds 150 to 500 dollars per procedure. A basic economy car without sensors might land near 300 to 450 dollars all in.
If insurance covers glass with a low or zero deductible, you’ll usually be offered a network shop. That can be fine, but you are allowed to choose. If you prefer a specific installer, ask them to process the claim. Many independent shops have direct billing relationships and will handle the paperwork after a quick auto glass quote. When price shopping, match apples to apples: OEM versus aftermarket glass, included moldings, mobile fee, and calibration. A bare-bones windshield quote that excludes trims or calibration can look appealing until you add those back.
For classic cars or vehicles with rust at the pinch weld, plan for surprises. Rust remediation can add a day and a few hundred dollars in materials and labor, but it’s non-negotiable if you want a strong bond. Some insurance policies won’t cover rust repair because it’s pre-existing damage.
Weather, storage, and day-of logistics
Think like an adhesive. Cold slows cure, heat speeds it, humidity helps one-component urethanes but hurts primers that need dry flash times. If you park outside in winter, schedule the job at a shop or a warm garage. Most urethane makers publish safe drive-away charts. A common chart might say 60 minutes at 73 degrees and 50 percent humidity, 4 hours at 32 to 41 degrees. Those are not suggestions. They’re the time it takes to pass crash-relevant strength thresholds.
If you need the car the same day, tell the shop your schedule so they can pick the right adhesive. For mobile work, ask if they carry a winter-grade urethane and whether they measure surface temperature, not just air. Glass sitting in a cold truck can be 20 degrees colder than the air and will chill the bead the minute it touches.
After install, avoid slamming doors for 24 hours. The pressure spike can blow a still-green bead and create micro-voids that become leaks later. Leave a window cracked if you must close the car in heat. Avoid high-pressure car washes for a couple of days to protect the trims and allow full cure.
What you can see versus what you should ask
Most of the critical work hides under the molding. You can still gauge quality with a few polite questions and quick observations.
- What adhesive are you using today, and what is the safe drive-away time at current conditions? Can you note it on the invoice? Did you trim the old urethane to a thin layer and prime bare metal? Which primers did you use on glass and body? Will you calibrate the cameras in-house and provide a pre-scan and post-calibration report, or will you send the car to a partner or dealer? Is the glass OEM or high-spec aftermarket? If aftermarket, which brand, and have you calibrated this brand on my make? If we find rust at the pinch weld, how do you handle it? Will you stop and call me, and do you have the right materials?
A confident installer will answer without defensiveness. If you get vague talk or see someone trying to save time by gluing over dirt, that’s your cue to pause.
Special cases that change the playbook
Heads-up display windshields use a specific interlayer and wedge angle to project sharply. Substitute the wrong glass, and the image doubles. Acoustic glass uses a sound-damping interlayer to keep cabin noise down. Heated windshields add fine wires or conductive coatings. Some vehicles include humidity sensors, rain sensors with gel pads, or camera heaters. Each feature adds small steps. Missing a replacement gel pad for a rain sensor can cause erratic wiper behavior. Using a universal mirror button adhesive on a windshield that expects a bonded bracket can create a failure point. On European cars with narrow A-pillars and deep dashboards, removal of trims is tedious and clip-specific. A pro will stock model-specific clips to avoid reusing brittle parts.
Vehicles that have been repainted pose another challenge. Aftermarket paint can delaminate when the old bead is cut out, revealing bare metal that needs corrosion protection. If a repainted pinch weld isn’t fully cured or lacks proper primers, urethane adhesion suffers. An experienced tech recognizes suspect paint and takes extra steps or advises a body shop visit before the glass goes in.
Work trucks and off-road vehicles live dusty lives. Dust is the enemy of adhesive bonding. I’ve seen desert rigs where the cowl area was packed with fine powder. A hose and brush rinse before prep can save you from a bond failure. It takes fifteen minutes and a little patience.
The case for choosing the installer first, price second
Over the long term, the small price spread between a careful and a hurried installation is trivial compared to the cost of a roof crush failure or an airbag that deploys against air. Even on the day-to-day level, a leak that ruins a BCM under the dash or a miscalibrated camera that brakes hard for a phantom can erase any savings. When you search for auto glass replacement, look for shops that talk about process instead of discounts. A clean bay, labeled adhesives, primer bottles with dates, torque specs for wiper arms written down, calibration targets stored with care, and techs who wear fresh gloves before handling primed areas, those are the tells.
If you are collecting windshield replacement quotes, ask every shop the same five questions. Note whether they include moldings and clips, whether calibration is in-house, the brand of glass, the adhesive and SDAT, and whether they are AGRSS registered. The cheapest bid might still win if it checks the boxes, but you’ll know why you chose it.
When repair beats replacement
Small stone chips can often be repaired. A clean bull’s-eye or star up to the size of a quarter, away from the edge and out of the driver’s critical sight area, is a candidate. Repairs cost a fraction of replacement, preserve the factory bond, and maintain camera calibration. The sweet spot is within a few days of the impact before dirt and moisture work in. A repaired chip remains visible as a faint mark, but it restores much of the strength and stops the crack from growing. If a crack runs to the edge or crosses a camera’s viewing zone, replacement becomes the only path.
Shops that push repair when it’s safe to do so are thinking about your long-term safety rather than today’s invoice. That’s a good sign.
A brief story that captures the stakes
A family SUV came into a shop after a driveway replacement and a summer of odd behavior from the lane-keeping system. The windshield looked fine, no leaks, OEM-logoed glass. The client wanted a calibration. The tech set up targets. The camera refused to calibrate, flagging a yaw error. On close inspection, the bracket bonded to the glass sat a degree off twist. The glass was real OEM, but from a batch with slightly mispositioned brackets. The previous installer jammed the mirror mount to fit and hoped the camera would adapt. It did not. The fix required another windshield. No one was trying to be sloppy, but the combination of a small manufacturing deviation and a lack of calibration equipment led to months of gentle steering corrections at highway speeds that the owner thought were just “quirky.” A careful post-install calibration would have caught it on day one.
Your next steps
If you need an auto glass quote today, pause for ten minutes and take stock. Check whether your car has a camera or rain sensor near the mirror. Look for heating lines at the wiper area. Note any water leaks or wind noise you already have, and any prior bodywork around the windshield frame. When you call around for a windshield replacement, give those details. Ask the shop to include glass brand, moldings, calibration, and adhesive SDAT in the windshield replacement quote. If the numbers vary widely, dig into the differences. Trust the shop that treats your questions as normal, not annoying.
A windshield doesn’t shout when it’s installed right. It just goes quiet, the wipers sweep smoothly, the cameras see straight, and the car feels solid over a railroad crossing. That quiet is the sound of standards at work, from federal rules to the installer’s habits. Respect the glass, respect the bond, and the rest takes care of itself.